Small-Space Home Office: The Complete Setup Guide
A great home office isn’t about square footage. It’s about getting a handful of details right — the height of your screen, the angle of your elbows, where the light falls — and then making them fit the space you actually have.
If that space happens to be the corner of a studio, the foot of your bed, or a shared dining table, this guide is for you. We’ll walk through everything from the five measurements to take before you buy anything, to ergonomics, lighting, storage, and keeping your landlord happy.
The goal: a setup that supports your body all day and disappears (or at least behaves) the rest of the time.
Start With Measurements, Not Products
The most common small-space mistake is buying the desk or chair first and discovering it doesn’t fit — or doesn’t fit you. Reverse the order. Measure your space and your body first, then shop against those numbers.
Grab a tape measure and write down these five things.
The 5 Measurements to Take First
1. The footprint of your zone. Measure the width and depth of the exact spot where the office will live. Note anything that eats into it: a radiator, a baseboard, a door that swings inward, a window you don’t want to block.
2. Seated elbow height. Sit in the chair you’ll actually use, relax your shoulders, and bend your elbows to 90 degrees. Measure from the floor to the underside of your forearm. This number is your target desk surface height — more on why below.
3. Eye height when seated. Sitting upright, measure from the floor to your eyes. The top of your screen should land at or just below this line.
4. Clearance above and beside. If you’re tucking a desk under a loft bed, into a closet, or beside a window, measure vertical clearance and any width pinch points. Slim wall-mounted or floating options often win here.
5. The path in and out. Measure doorways, stairwells, and tight turns. A desk that fits the corner but not the front door is a return waiting to happen — especially in apartments with narrow hallways.
Keep these five numbers in your phone. Every product decision from here gets checked against them.
The Ergonomic Targets (and How to Hit Them in Tight Space)
Ergonomics is just a set of neutral positions your body can hold without strain. Here are the standard targets and small-space tactics for each.
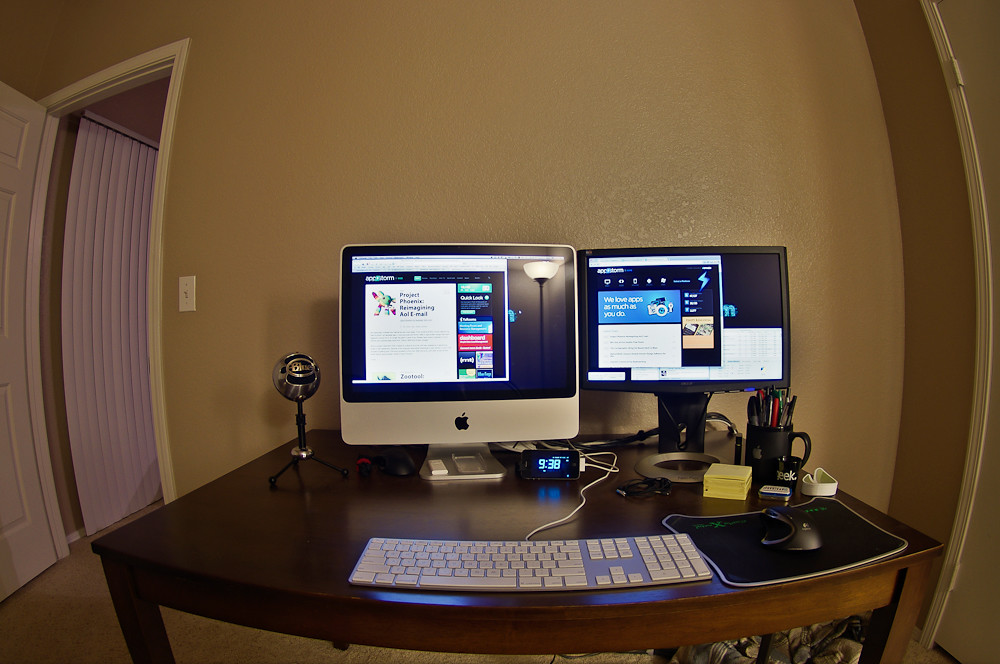
Screen Height and Distance
Position the top of your screen at or slightly below eye level, so your gaze drops gently to the center. Aim for roughly an arm’s length away — about 20 to 30 inches for most people.
In a tight setup, you rarely have room for a deep monitor arm, so lean on cheaper space-savers:
- A laptop stand plus an external keyboard raises the screen without adding desk depth.
- A monitor riser that doubles as a shelf reclaims the space underneath for a notebook or charger.
- A clamp-on monitor arm frees the entire desktop and lets you push the screen back over the edge when you need surface space.
If you work on a laptop alone, a stand and a separate keyboard is the single highest-value ergonomic upgrade you can make. Without it, you’re forced to choose between a good screen height and a good wrist position — you can’t get both.
Elbows, Wrists, and Desk Height
Your elbows should rest near 90 degrees with shoulders relaxed and forearms roughly parallel to the floor. Wrists stay neutral — straight, not bent up or down.
This is why that seated-elbow-height measurement matters: a fixed desk that’s too tall is the most common cause of shoulder and neck tension in home setups. Standard desks run around 29 to 30 inches, which is too high for many people when seated.
Small-space fixes:
- A keyboard tray lowers your typing surface a couple of inches below a too-tall desk.
- A height-adjustable or sit-stand desk lets you dial in the exact number — and a compact one doubles your usable space by letting you alternate sitting and standing.
- If the desk is fixed and slightly low, raise the chair and add a footrest (more below).
Seat, Back, and Feet
Your thighs should be roughly parallel to the floor with feet flat, and your lower back should be supported in its natural curve.
When you raise your chair to meet a tall desk, your feet often dangle — which cuts circulation and strains your legs. The fix is a footrest; in a pinch, a sturdy box, a stack of books, or a small storage ottoman does the job and hides clutter at the same time.
Choosing the chair itself is the biggest single decision for comfort and floor space, so we cover it in depth here: Choosing an Ergonomic Chair for a Small Space: The Footprint-First Guide.
Light on Your Task
Good lighting is an ergonomic factor people forget. Glare and dim light make you crane, squint, and lean in — undoing your careful screen positioning. We’ll cover small-space lighting in its own section below.
Zoning: Separating Work From Living
In a small home, the office shares space with the rest of your life. The challenge isn’t just fitting the desk — it’s being able to stop working when the desk is three feet from your bed or couch. A defined zone protects both your focus and your downtime.
You don’t need a wall. You need a visual and mental boundary.
- Use a rug to anchor the work zone as its own “room.” A small rug under the desk and chair does a surprising amount of psychological work.
- Orient the desk to face away from the bed or TV if you can, so your line of sight during work doesn’t include the relaxing parts of the room.
- Add a slim divider — an open shelf, a folding screen, or even a row of plants — to suggest separation without blocking light or cramping the floor.
- Make it “closeable.” A desk that tucks away, a laptop that goes in a drawer, or a cover over the monitor at day’s end signals to your brain that work is done. This matters most in studios and bedrooms.
For bedroom-specific layout (where work-life separation is hardest), see How to Set Up an Ergonomic Desk in a Small Bedroom.
Lighting a Small Workspace
Aim for layered light so you’re not relying on one harsh source.
Get natural light from the side, not behind or in front. A window behind your screen creates glare; a window directly in front of you puts your face in shadow and tires your eyes. Position the desk so daylight comes across your workspace from the side.
Add a task light. A small, adjustable desk lamp — ideally one that clamps to the edge to save surface area — lets you light your work directly. Look for adjustable brightness and a position that doesn’t reflect off your screen.
Don’t forget your video-call face. If you’re on camera, a light source in front of you (a small lamp behind the laptop, or facing the window) reads far more professional than a glowing screen in a dark room.
Reduce screen glare. Tilt the monitor slightly down, use a matte screen if reflections are bad, and keep bright light sources out of your direct sightline.
Going Vertical: Storage in a Tiny Footprint
When floor space is scarce, build up. Vertical storage keeps your desktop clear, which is the fastest way to make a small office feel calm and usable.
Above the Desk
- Floating shelves above the desk hold books, supplies, and decor without consuming floor area.
- A pegboard or wall grid turns the wall into flexible, rearrangeable storage for cables, headphones, and small tools.
- A wall-mounted file pocket or tray keeps paper off the surface.
Below and Beside the Desk
- A slim rolling cart slides under or beside the desk and rolls out when you need it.
- Under-desk drawers or a small file cabinet on casters add storage without a bigger footprint.
- Use the back of a door or the side of a bookshelf for an over-the-door organizer.
Keep the Surface Sacred
The desktop is your most valuable real estate. Anything that lives there permanently — a printer, a stack of paper, a tangle of chargers — should earn its place or move to a shelf, drawer, or cart. A clear surface is the difference between a desk you want to work at and one you avoid.
For desks built specifically around small footprints, including wall-mounted and fold-down options, start here: The Complete Guide to Desks for Small Spaces, Apartments & Renters.
Renter-Proofing: Setup Without Losing Your Deposit
If you rent, the rule is simple: maximize hold, minimize damage. You can mount, hang, and customize plenty without putting your deposit at risk — you just have to choose the right hardware and methods.
A quick overview of renter-friendly approaches:
- Lean before you drill. Leaning shelves, ladder desks, and freestanding units give you vertical storage with zero holes.
- Use damage-free mounting for light items — removable adhesive hooks and strips handle cables, small organizers, and lightweight decor. Respect their weight limits and follow the removal instructions so they peel off cleanly.
- Tension rods create hanging space or light dividers in alcoves and closets without hardware.
- Patch-friendly anchors. When you must hang something heavier, small nails or thin screws leave holes that are easy to spackle. Photograph the wall first and keep a little touch-up paint.
- Furniture-mounted, not wall-mounted. Clamp lights, monitor arms, and pegboard frames to the desk itself instead of the wall whenever possible.
- Protect floors. Felt pads and a rug under a rolling chair prevent scratches that come straight out of your deposit.
This is the overview — for a step-by-step, room-ready process, follow the Ergonomic Desk Setup Checklist for Renters.
Cables and Noise: The Finishing Touches
These two details are easy to skip and surprisingly important in a small space, where clutter and sound have nowhere to hide.
Taming Cables
In a tight setup, cables are visible from everywhere, so a little management goes a long way.
- Bundle and route cords along the desk leg or under the edge with reusable ties or clips.
- A cable tray or sleeve under the desk hides a power strip and the worst of the tangle.
- Mount the power strip to the underside of the desk so nothing pools on the floor.
- Go cordless where it’s painless — a wireless keyboard and mouse remove two of the most visible cables.
Managing Noise
Small homes and shared walls mean sound carries both ways.
- Soft surfaces absorb sound. A rug, curtains, and a fabric chair quiet a room far more than a bare hard-floored corner.
- A good headset is the most reliable fix for calls — it controls both what you hear and what your mic picks up.
- Position your mic away from noise sources like a window facing the street or a humming fridge.
- If echo on calls is a problem, even a few soft items nearby — a throw, a bookshelf full of books — break up the reflections.
Putting It All Together
Here’s the order that keeps a small-space build from going sideways:
- Measure your zone, your body, and your access path — the five numbers.
- Set your ergonomic targets: screen at eye level, elbows at 90, feet supported, light from the side.
- Choose the desk and chair that hit those targets in your footprint.
- Zone the space so work and rest feel separate.
- Build up with vertical storage and keep the desktop clear.
- Renter-proof with damage-free and furniture-mounted solutions.
- Finish with cable and noise management.
A small space is not a compromise — it’s a constraint that forces good decisions. When every piece has to earn its spot, you tend to end up with a workspace that’s more intentional, more comfortable, and easier to live with than a big room full of stuff.
Start with the tape measure. Everything else follows from there.