How to Hide Desk Cables in a Rental (No-Drill)
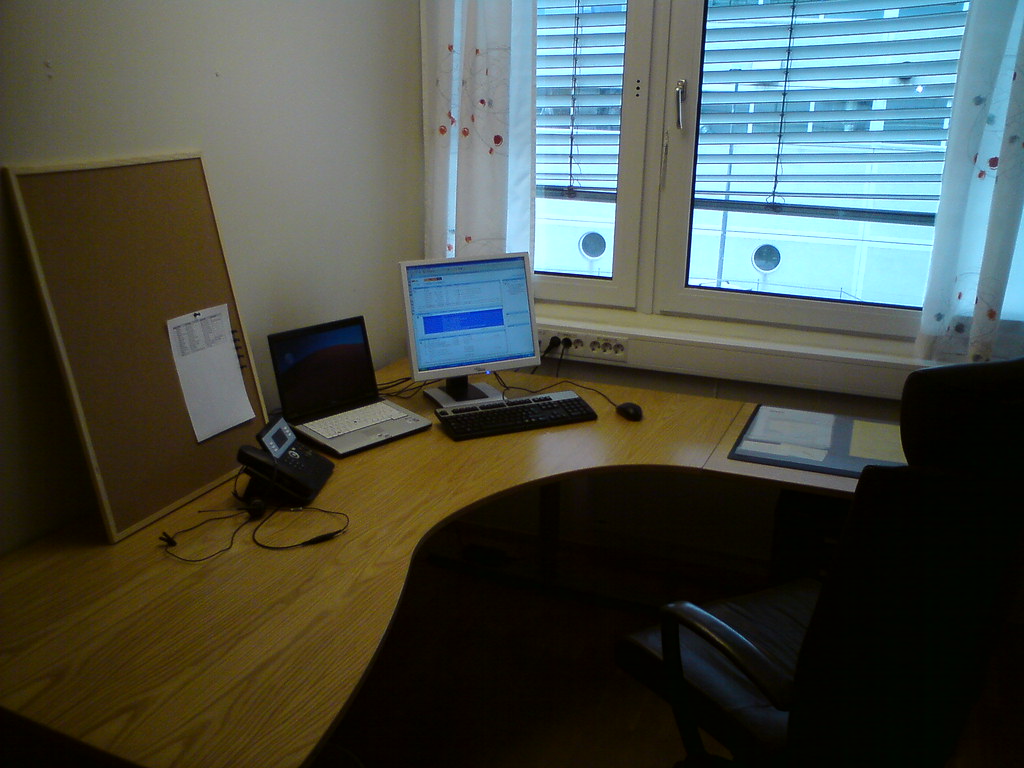
A tangle of cables under your desk isn’t just an eyesore. In a small apartment, it’s a tripping hazard, a dust magnet, and a stressor every time you glance down mid-video-call.
The catch? Most cable-management advice assumes you can drill into the wall or your desk. As a renter, you can’t — not without risking your deposit.
Good news: you can get a clean, organized setup using only clamps, adhesive, and a little patience. No drill. No holes. No spackle on move-out day.
Here’s exactly how to do it.
Before You Start: The Renter’s Cable Rules
Two principles will keep you out of trouble.
1. Test every adhesive on a hidden spot first. Stick a small piece somewhere invisible — the back edge of a windowsill, inside a closet — and leave it 24 hours. If it lifts cleanly, you’re good. If it fights you, that paint is fragile and you’ll want clamps or freestanding solutions instead.
2. Favor clamps over adhesive wherever possible. A clamp grips your desk edge and leaves zero residue. Adhesive is your backup for surfaces that can’t be clamped — walls, baseboards, the underside of a thin desk.
Keep these in mind and almost everything below becomes low-risk.
Step 1: Mount an Under-Desk Cable Tray (Clamp or Adhesive)
The single biggest win is getting cables up and off the floor. An under-desk tray holds your power strip, excess cable, and bulky adapters in one hidden basket beneath the desktop.
You have two mounting styles:
Clamp-on trays (best for renters)
These grip the rear edge of your desk with a screw clamp — no adhesive, no holes. They’re the safest option because removal is instant and damage-free.
Clamp trays work best on desks with an open back edge and a top thick enough for the clamp to bite (most standard desktops qualify). If your desk has a solid panel running to the floor, a clamp may not fit.
Adhesive trays (for clamp-incompatible desks)
If clamping isn’t an option, look for trays that mount with strong removable adhesive strips. Stick them to the underside of the desktop, not a wall, so any worst-case residue is on your furniture rather than the rental’s surfaces.
For specific picks and weight ratings, see Best No-Drill Under-Desk Cable Management Trays.
Pro tip: Mount the tray toward the back of the desk, not the front. You want it out of knee range and out of sight from anyone facing you.
Step 2: Route Cables Along the Desk with Velcro Ties
Once the bulky stuff lives in the tray, you’re left with the cables that need to travel — monitor power, laptop charger, USB hub.
Bundle them with reusable velcro cable ties (not zip ties). Velcro lets you add or remove a cable in seconds without cutting anything, which matters when your setup changes.
A simple method that works every time:
- Lay your cables flat along the path they’ll take (desk leg, back edge, into the tray).
- Bundle loosely every 6–8 inches with a velcro strap.
- Leave a little slack near devices so you can still reach and unplug them.
Velcro ties leave no marks anywhere, so use them freely. They’re the cheapest, lowest-risk tool in your whole kit.
Step 3: Hide Wall Runs with Removable Raceways
Sometimes a cable has to climb or cross a wall — say, to reach a monitor mount or a wall-adjacent shelf. A cable raceway (a slim channel that snaps shut over the cable) hides it cleanly.
The renter concern is the adhesive backing. Many raceways ship with permanent foam tape that will peel paint when you remove it.
To stay deposit-safe:
- Choose raceways designed with removable adhesive, or
- Replace the factory tape with removable mounting strips rated for the raceway’s weight, or
- Mount the raceway to your furniture (the back of a bookshelf, the side of the desk) instead of the wall whenever the layout allows.
Run raceways in straight vertical or horizontal lines and paint-match if the raceway is paintable — though honestly, a slim white channel disappears against most white walls without any effort.
Removal note: Warm the adhesive gently with a hair dryer on low before peeling. Heat softens the glue so it releases instead of tearing the paint with it.
Step 4: Mount a Power Strip Without Drilling
A power strip flopping on the floor undoes all your hard work. Get it up off the ground with one of these no-drill methods.
Adhesive-strip mounting. Many power strips have keyhole slots on the back. Instead of screws, attach heavy-duty removable mounting strips and press the strip to the underside of your desk or the inside of the tray. Mind the weight rating — a power strip plus six plugged-in adapters gets heavy.
Velcro-to-tray. The simplest approach: velcro the power strip directly to the bottom of your under-desk tray. No wall contact at all, and it lifts right out when you move.
Freestanding cable box. If you’d rather avoid mounting entirely, a cable-management box sits on the floor and hides the strip and excess cord inside. Zero adhesive, zero risk — just push it behind a desk leg.
Safety first: Never cover a power strip with fabric or trap it in an unventilated space. It needs airflow to shed heat. A vented tray or box is fine; a closed drawer is not.
Step 5: Manage the Run to a Far Outlet — Safely
Apartment outlets are rarely where you want them. When your desk sits across the room from the only free socket, resist the urge to run a cable across the open floor.
Here’s how to handle distance without creating a hazard:
Hug the baseboard. Route the cable along the wall where it meets the floor. Hold it in place with removable adhesive cable clips spaced every couple of feet. This keeps the run out of the walking path.
Use a floor cord cover for unavoidable crossings. If a cable absolutely must cross a doorway or walkway, lay it under a low-profile floor cord cover (a flat ramp that protects the cable and stops toes from catching). It’s removable and far safer than tape.
Never run cords under rugs or through doorways that pinch them. A cable crushed under a rug or a closing door is a genuine fire risk. The whole point of routing the run is to keep it visible-but-tidy along the edges, not buried where heat can build up.
A word on extension cords: Use a properly rated cord for the distance and load, and don’t daisy-chain power strips together. One strip, one wall outlet.
For a full room-by-room approach to protecting floors and walls, see Apartment-Proof Your Desk: Cables, Floors & Noise Without Damage.
Safe Removal: How to Keep Your Deposit on Move-Out Day
A deposit-safe setup is only safe if it comes off cleanly. Build removal into your plan from day one.
- Clamps: Just unscrew. Done. Nothing to clean up.
- Velcro ties: Peel apart and pack them — they’re reusable for your next place.
- Adhesive strips: Pull the tab slowly and straight down along the wall, not outward. Removable mounting strips are designed to stretch and release; yanking outward is what damages paint.
- Raceways and clips: Warm with a hair dryer on low, then peel slowly. Wipe any light residue with a dab of rubbing alcohol on a cloth.
- Take photos of each spot after removal. If anything does mark, you’ll want a record of how minor it was.
Do the removal a day or two before your final walkthrough, not in a panic on the last morning. Adhesive comes off cleaner when you’re not rushing.
FAQ
Can I hide desk cables without damaging the walls at all?
Yes. Stick to clamp-on trays, velcro ties, and freestanding cable boxes and you’ll never touch a wall. Only reach for adhesive raceways and clips when a cable genuinely has to run along a wall — and use removable strips when you do.
What’s the safest way to mount things in a rental?
Clamps first, removable adhesive second. A clamp leaves no trace at all. When clamping isn’t possible, use mounting strips rated for the weight, test them on a hidden spot first, and remove them by pulling slowly downward.
Will removable adhesive strips ruin my paint?
They shouldn’t if you use them correctly: don’t overload them, give the adhesive a day to cure, and remove by stretching the tab straight down. The biggest causes of damage are exceeding the weight rating and peeling outward. Always test on an inconspicuous area first.
How do I run a cable to an outlet on the other side of the room?
Route it along the baseboard with removable cable clips, and use a low-profile floor cord cover for any spot where it must cross a walkway. Never run cords under rugs or pinch them in doorways.
Are these methods landlord-approved?
No-drill, adhesive-free methods like clamps and freestanding boxes don’t alter the unit, so they sidestep most lease concerns. If you plan to use any adhesive on walls, a quick message to your landlord is never a bad idea — but the safest choice is always the method that touches nothing permanent.
Putting It All Together
You don’t need a drill — or a contractor’s deposit’s worth of nerve — to get a clean desk setup in a rental.
Lift the bulk into a clamp-on tray, bundle the runners with velcro, hide wall runs in removable raceways, mount your power strip without screws, and route any long run safely along the baseboard.
Plan the removal as carefully as the install, and you’ll walk away with a tidy workspace and your full deposit. That’s the whole point.