Apartment-Proof Your Desk: No-Damage Setup Guide
Setting up a home office in a rental comes with a quiet anxiety most desk guides ignore: every screw hole, scuff, and dent could come out of your deposit. You want a workspace that feels intentional and supports your body for eight-plus hours a day — without a single line item on your move-out inspection.
The good news: almost everything that makes a desk setup look “permanent” can be done with removable, damage-free alternatives. This guide walks through the three apartment-specific problem areas — cables, floors, and noise — and gives you a renter-friendly approach to each.
Let’s protect your space and your deposit.
The Renter’s Mindset: Reversible by Default
Before we get into specifics, adopt one rule: assume you’ll have to undo everything.
That single mindset shift changes how you choose products. Instead of asking “how do I mount this,” you ask “how do I mount this and remove it cleanly.” It steers you toward clamps over screws, adhesive strips rated for removal over permanent mounting tape, and freestanding solutions over anything that touches a wall stud.
It also saves money. Damage-free gear tends to be cheaper than the patch-and-repaint job you’d otherwise face at move-out.
Three things are worth photographing the day you move in: the walls behind your desk, the floor under it, and any existing scuffs. If a dispute comes up later, dated photos are your best friend.
Cable Management Without Drilling
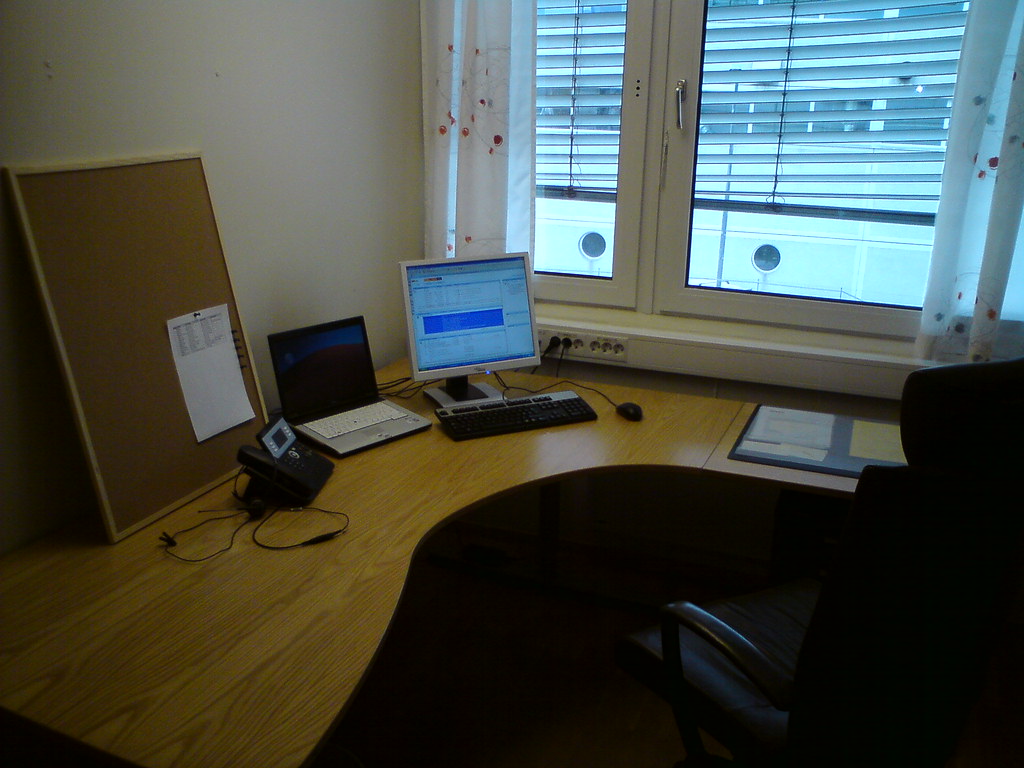
Loose cables are the fastest way to make a small space feel chaotic. They tangle, collect dust, snag your chair wheels, and turn a clean desk into visual noise. In an apartment, the challenge is corralling them without the screw-in clips and drilled-through grommets that most tutorials assume.
Start by reducing cables, not just hiding them
The cleanest cable setup is the one with fewer cables. Before you manage anything, audit what’s actually plugged in.
- Can your monitor power your laptop and pass video over a single cable? A laptop that charges over USB-C can collapse three cables into one.
- Are you still running peripherals you never use?
- Could a small powered hub replace a tangle of individual adapters?
Cutting two or three cables out of the equation does more for the look of your desk than any tray.
Route along the desk, not into the wall
The renter-safe move is to keep cable management on the furniture, where you can remove it freely.
A few approaches that leave no marks:
- Under-desk trays that clamp or screw into the desk itself (not the wall) keep power strips and excess cable length off the floor. Because they attach to your own furniture, they don’t touch the rental at all. For a full breakdown of options, see Best No-Drill Under-Desk Cable Management Trays.
- Adhesive-backed cable clips and channels rated as removable can run cords along the desk’s edge or back leg. Test any adhesive on a hidden spot first, and peel slowly when you remove it.
- Cable sleeves or wraps bundle multiple cords into one tidy line — great for the run between your desk and the nearest outlet.
Crossing the floor safely
If cables have to cross open floor to reach an outlet, don’t tape them down with anything aggressive. A low-profile cord cover or a rug runner keeps them flat, prevents trips, and lifts cleanly when you leave.
For the bigger picture on concealing cords in a rental — including wall outlets, baseboard runs, and behind-furniture routing — we go deeper in How to Hide Desk Cables in a Rental.
Protecting Floors: Hardwood, Laminate, and Carpet
Floors are where renters lose deposits quietly. A rolling chair on bare hardwood, a heavy desk leg on laminate, or compressed carpet under a workstation can all add up to charges. Protection here is cheap insurance.
The right fix depends on your floor type, so let’s take them in turn.
Hardwood and laminate
These look durable but scratch and dent more easily than people expect. Two culprits do most of the damage: chair wheels and furniture feet.
For furniture feet, stick-on felt pads under each desk and chair leg prevent scratches when you nudge things around. They’re inexpensive, invisible, and remove without residue. Check them every few months — they wear flat and need replacing.
For chair wheels, a hard chair mat distributes weight and stops casters from scarring the finish. In a tight apartment, a mat sized to your actual rolling range — not the whole room — keeps things compact.
Standard caster wheels can also be swapped for soft, rubberized blade-style wheels designed for hard floors. They roll quieter and gentler, and they’re a tool-free five-minute change on most chairs.
Carpet
Carpet won’t scratch, but it has its own issues: chair wheels drag and stress the fibers, heavy furniture leaves deep compression marks, and rolling resistance makes your chair feel sluggish.
A hard chair mat made for carpet (these have grippers underneath to anchor into the pile) solves both the wear and the sluggish-rolling problem. It gives your chair a smooth surface and spreads the load so the carpet recovers when you move out.
For the desk legs themselves, wide furniture coasters spread weight over a larger area and reduce the depth of compression dents.
A note on mats and small spaces
Chair mats can dominate a tiny room visually. If yours feels too big, look for a clear or neutral-toned mat and size it to your seated range. The goal is protecting the high-traffic zone under your chair — not carpeting the carpet.
Noise and Vibration: Being a Good Downstairs Neighbor
In an apartment, your desk setup isn’t just about your comfort — it’s about what travels through the floor and walls to the people around you. This is the part renters most often overlook, and it’s where a little courtesy prevents a lot of friction.
There are two kinds of noise to think about: airborne noise (sounds traveling through the air, like a loud mechanical keyboard or a fan) and impact/vibration noise (sounds traveling through the structure, like footsteps or a treadmill motor). They need different fixes.
Walking pads and standing-desk movement
Under-desk walking pads are popular for good reason, but they’re a classic downstairs-neighbor complaint. The motor hums and your footsteps thud straight into the floor below.
If you use one:
- Place a dense anti-vibration or rubber mat under the pad to absorb impact and motor vibration. This is the single most effective step.
- Walk at a slower pace. Higher speeds mean harder foot strikes and more transmitted noise.
- Keep heavy use to reasonable daytime hours rather than early mornings or late nights.
The same mat-and-timing logic applies to a standing desk’s motor if it’s loud, though those run only briefly.
Quiet peripherals
Mechanical keyboards are wonderful and can be genuinely disruptive through a thin wall. You don’t have to give one up — you have options:
- Choose quieter switch types designed to dampen sound, or add dampening foam and O-rings to a board you already own.
- A desk mat under your keyboard and mouse absorbs a surprising amount of clatter and protects the desk surface too.
- If your mouse clicks carry, silent-switch mice exist and make a real difference for late-night work.
Fans, drives, and the low hum
Steady low-frequency sounds — a desktop fan, an external hard drive — are easy to ignore yourself and easy for a neighbor to fixate on. Set the machine on a vibration-absorbing pad rather than directly on a resonant desk surface, and keep it off shared walls where you can.
Downstairs-neighbor etiquette
None of this requires soundproofing your apartment. A few habits cover most situations:
- Do your loudest activities (walking pad, calls on speaker) during normal waking hours.
- If you’re unsure whether something carries, ask your neighbor once. A two-minute conversation beats a noise complaint, and most people appreciate being asked.
- When you take video calls, a headset keeps your audio in and your space quieter for everyone.
Deposit-Safe Everything: A Quick Checklist
Pulling it all together, here’s how to keep your entire setup reversible. Run through this before and during your stay.
Walls
- No drilling for cable routing, monitor arms, or shelves. Use desk-clamp mounts and freestanding furniture instead.
- If you use adhesive hooks or clips, choose ones rated as removable and test on a hidden spot first.
Floors
- Felt pads under every furniture leg; replace them as they wear.
- A chair mat matched to your floor type (hard-floor vs. carpet).
- Consider soft caster wheels for hard floors.
Cables
- Manage on your furniture, not the rental’s walls.
- Cover or cushion any floor-crossing cords to prevent trips and marks.
Noise
- Anti-vibration mat under walking pads and loud equipment.
- Quieter peripherals and a desk mat to cut clatter.
- Loud activities during reasonable hours; a quick word with neighbors when in doubt.
Documentation
- Photograph walls and floors at move-in and move-out.
- Keep packaging or notes for anything you’ll reverse later.
Bringing It Together
Apartment-proofing your desk isn’t about compromising your setup — it’s about getting the same ergonomic, organized workspace through reversible means. Clamp instead of drill. Pad and mat instead of risking the floor. Absorb vibration instead of broadcasting it downstairs.
Do those three things, and your desk works as hard as you do without putting your deposit on the line. When you’re ready to tackle the specifics, start with Best No-Drill Under-Desk Cable Management Trays and How to Hide Desk Cables in a Rental — the two areas where small choices make the biggest visible difference.
Your tiny apartment can hold a setup you’re proud of. It just has to be one you can take with you.